Documentation Maintenance
Add / Maintain API documentation and restrict visibility of documentation files.
Table of Contents
- What is the API documentation maintenance process?
- Who can update API documentation content?
- How do I add API documentation?
- Can I link to API documentation on a different site?
- What are the content guidelines for API documentation?
- What are the visibility rules for API documentation?
- How do I control visibility of API documentation files?
What is the API documentation maintenance process?
All API documentation must be developed and maintained outside of the platform in your own HTML editor. Once your HTML content is ready you can upload it to the site.
If you add a new version, you can update the existing documentation or create an entirely different set of documents. By default all documentation files reside in the same folder, so it's best to use unique names for new files.
For more detailed information about working with API documentation files, see Content Development Guidelines.
Who can update API documentation content?
API documentation can be updated by:
- An API Admin for that API
- A Business Admin
How do I add API documentation?
You can add documentation for your API to the API > Documents section by uploading content using the platform File Explorer or by adding API documentation using the Swagger documentation tool that is integrated with the platform. See Content Development Guidelines for details.
Can I link to API documentation on a different site?
Yes. If you already have a website established for your API and/or your documentation, you can upload a file with some introductory text and a link to your website.
Remember to use the "target="_blank" attribute on the link so that the documentation site opens in a new window rather than replacing the platform user interface. See Content Development Guidelines for details.
What are the content guidelines for API documentation?
The platform provides a detailed set of content development guidelines for API documentation, including publishing, editing, styles, content organization, file upload, testing, and updating. See Content Development Guidelines for details.
What are the visibility rules for API documentation?
The following visibility rules apply for API documentation:
- Documentation for APIs that are designated as Public, and do not use licenses, are visible to all users (including anonymous users).
- API documents mapped to Public Scopes are visible to all users (including anonymous users).
- Documentation for APIs that are designated as Private, but do not use licenses, are visible only to API Admins, Business Admins, and users who are members of a group that was invited to the API and accepted the invitation.
- API documents mapped to Private Scopes are available only to users who have a License that includes the applicable scope. Note that the API documentation must be tagged according to the tagging rules as explained in How do I restrict visibility of API documentation files? below. If scopes are private and documentation is not tagged, the documentation is not visible even to users who have visibility to the private scopes.
How do I control visibility of API documentation files?
The platform offers a series of visibility filters that can be used to restrict visibility of API documentation files or portions of content within individual files. When your API documentation is tagged with the appropriate filters, the platform displays documentation to a specific user based on the licenses, scopes, and operations for which that user has a licensed contract with the API.
When a user who has approved access to an API selects the Documents menu link in the APIs section to view the documentation, the user sees the designated portion of the API documentation based on the scopes and operations assigned to the licenses that the user has requested (and been granted). Content for all other licenses is hidden.
When using this feature, make sure that all links associated with documentation sections being filtered are also tagged accordingly. If there are visible links to hidden content, from the user's perspective the links will appear to be broken.
Note: Visibility filters assigned to documentation are implemented on the browser side only. This feature is considered a "personalization" feature, not authorization.
Using the Metadata.xml File
This option allows you to restrict visibility of API documentation and downloadable files in the API > Documents folder by creating a metadata.xml file that includes one or more regular expressions filtering documentation by any combination of the following:
- License
- Scope
- Operation
- File Extension
If you do not specify a metadata.xml file, all documentation displays for all API versions. To apply filters, apply the desired filters to the complete documentation set. You can then add additional filters on a per-version basis (See Filter by API Version below).
In the metadata.xml file, include each filter you would like to apply in <metadata> </metadata> tags. The filters are executed in sequential order. In the file, organize your filters in this order:
- First, filters that apply to all documents
- Next, API Version filters
The example below shows a simple metadata.xml file with one API version, one operation, one scope, and one license.
Note: In setting up your metadata.xml, make sure you represent the names of referenced objects, such as license, scope, or file names, exactly. Make sure the case matches.
<?xml version="1.0" encoding="UTF-8" standalone="yes"?>
<metadataconfig xmlns="http://soa.com/xsd/metadataconfig/1.0">
  <metadata>
    <APIVersionID xmlns="http://soa.com/xsd/api/1.0">apiversion12345.open</APIVersionID>
    <target>documents/index.html</target>
    <roles>
      <role name="InvitedUser"/>
    </roles>
  </metadata>
  <metadata>
    <target>documents/operation-name.html</target>
    <operations>
      <operation name="operation-name"/>
    </operations>
  </metadata>
  <metadata>
    <target>documents/public-scope-1.html</target>
    <scopes>
      <scope name="public-scope-1"/>
    </scopes>
  </metadata>
  <metadata>
    <target>documents/public-license-1.html</target>
    <licenses>
      <license name="public-license-1"/>
    </licenses>
</metadataconfig>
Filter by License
The <licenses> filter allows you to specify one or more license names in the metadata.xml file using the <license name> parameter. The license names represent those selected as part of an API Access Request. If a license selected in the Restricted License section is part of a defined license filter, access to view the API documentation will be granted after the API Access Request is approved.
<metadata>
  <licenses>
    <license name="license1">
    </license>
    <license name="license2">
    </license>
  </licenses>
</metadata>
Filter by Scope
The <scopes> filter allows you to specify one or more scopes using the <scope name> parameter. The scope names represent ones you mapped to the current API using the Scope Mapping function on the API > Details page.
<metadata>
  <scopes>
    <scope name="scope1">
    </scope>
    <scope name="scope2">
    </scope>
  </scopes>
</metadata>
Filter by Operation
The <operations> filter allows you to specify one or more operations using the <operation name> parameter. The operation names represent ones you mapped to the current API using the Scope Mapping function on the API > Details page.
<metadata>
  <operations>
    <operation name="operation1">
    </operation>
    <operation name="operation2">
    </operation>
  </operations>
</metadata>
Filter by Document Type
You can filter the document types you would like users to be able to see in the documents folder by specifying a regular expression in the metadata.xml file.
Note: If you do not specify a document type (i.e., the default), all documents/graphics will display in the /Documents folder.
For example, if you want only html files to display in the /Documents folder you could specify:
<target>.*\.html</target>
Or, if you want to filter so that authorized users can see only Microsoft Word .docx files in the /Documents folder, you could specify the following:
<target>.*\.doc</target>
You can also specify multiple filters. If you want to filter and display HTML and JPG files in the /Documents folder you could specify:
<target>.*\.html</target>
<target>.*\.jpg</target>
This expression should be placed after the <metadata> tag if your XML file does not include an API Version filter. If it does include an API Version filter, the expression should be placed before the filter.
Filter by File
You can filter documents based on a specific file to display in the documents folder by specifying a regular expression.
For example, you might have a PDF file you would like to present in the /Documents section. Using this example you would specify the following:
<target>apis/sample.pdf</target>
This expression should be placed after the <metadata> tag if your XML file does not include an API Version filter. If it does include an API Version filter, the expression should be placed before the filter.
Filter by API Version
In addition to applying filters to all API documentation, you can further filter an API version using the <api:APIVersionID> filter. You configure this filter by extracting the API Version ID plus tenant name (for example, apiversion400.open) from the API > Documents URL of your platform.
Example URL:
/api100.open/versions/apiversion400.open/documents
In your metadata XML file the resulting entry will look similar to the following:
<metadata>
  <api:APIVersionID>apiversion400.atmosphere</api:APIVersionID>
      [API documentation filter goes here]
</metadata>
This example illustrates filtering by API Version plus a specific document:
<metadata>
  <api:APIVersionID>apiversion400.atmosphere</api:APIVersionID>
    <target>apis/sample.htm</target>
      [API documentation filter goes here]
</metadata>
This example illustrates filtering by API Version plus a specific document type:
<metadata>
  <api:APIVersionID>apiversion400.atmosphere</api:APIVersionID>
    <target>apis/*\.html</target>
      [API documentation filter goes here]
</metadata>
Table of Contents
If you have selected a set of files to display in the Table of Contents that displays in the left navigation in the API > Documents section of the platform, the content dynamically displays based on the filters specified for all API documentation or for a specified API version.
Upload Metadata XML File
After configuring your metadata XML file, upload it to the API > Documents folder (i.e., in the /content/api/<api name>/documents folder).
If your API is private, app developers do not see the API documentation unless they have membership in a group that has access to the API. If a developer makes an API access request and the request is approved, and the License applicable to the API access contract includes access to additional content as defined in the metadata file, the developer can then see the additional documentation in the API > Documents section.
You can use the Metadata File method on its own or in combination with Documentation Tags (described in the next section).
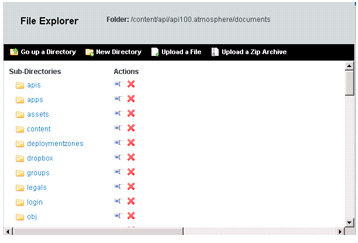
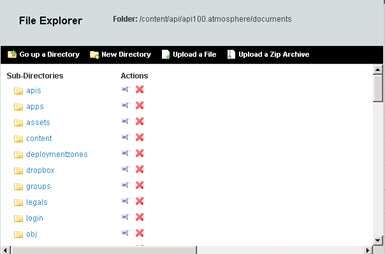
To upload the metadata.xml file via the File Explorer:
- Navigate to API > API Name > Documents.
- Click the File Explorer icon (in upper-left corner of the documentation panel)
- In File Explorer, click Upload a File.
- In the File Upload box, navigate to the location of the file you want to upload. Choose the file, and then click Open.
Using Documentation Tags
This option allows you to restrict visibility of specific portions of a document using a series of tags that display document content on the API > Documents page based on a license assigned to an API, a scope defined within a license, or an operation defined within a scope.
Note: You can use the Metadata File method (described in the previous section) on its own or in combination with Documentation Tags.
The following tags are supported:
Note that tags are mutually exclusive and cannot be nested. You can specify multiple entries (licenses, scopes, operations) and separate them with a comma.

Examples:
The following examples illustrate the platform UI configuration and tag requirements for the API documentation HTML file to restrict documentation visibility for license, scopes, and operations.
NOTE: When tagging files, make sure you apply the same tags to any links to tagged sections.
- showforlicense—This tag type restricts documentation based on a license name. Only app developers who have the specified license can see the tagged portion of the documentation.
- showforscope—This tag type restricts documentation based on a scope name. Only app developers who have a license that includes the specified scope can see the tagged portion of the documentation.
- showforoperation—This tag type restricts documentation based on an operation name. Only app developers who have a license that includes the specified operation can see the tagged portion of the documentation.
Tag Rules
When tagging your API documentation, the following rules apply:
Header:
The following header information should be included in each HTML file.
- Add xmlns:soa="http://soa.com" to the html tag. Your entry should look similar to the following:
<html lang="en" xmlns:soa="http://soa.com
- Add the following lines to the <head> tag of your HTML file:
showforlicense
To restrict documentation visibility by license, specify the license names in the showforlicense tag, adding one or more license names separated by commas. When an App Developer submits an API Access request for a specified license, and the request is granted, the developer can view the API documentation.
<soa:showforlicense licenseNames="Gold Level">
  <div class="soa-ui-cm-dynamic-docs">
    <p><a href="About_GoldLicense.htm">About the Gold-Level License</a>.</p>
  </div>
</soa:showforlicense>
showforscope
To restrict documentation visibility by scope, select the API-wide Mapping option or Operation-specific Mapping option in API Details > Scope Mapping >Edit Scope Details. In the API documentation HTML file, configure the tags as follows, adding one or more operation names separated by commas.
<soa:showforscope scopeNames="public-scope-1, public-scope-2">
  <div class="soa-ui-cm-dynamic-docs">
    <a href="two-public-scopes.html">two-public-scopes.html</a><br><br>
  </div>
</soa:showforscope>


Figure. API-wide Mapping using showforscope tag
showforoperation
To restrict documentation visibility by operation, select the Operation-specific Mapping option in API Details > Scope Mapping > Edit Scope Details. In the API documentation HTML file, configure the tags as follows, adding one or more operation names separated by commas.
<soa:showforoperation operationNames="addPayment">
  <div class="soa-ui-cm-dynamic-docs">
      <p><a href="addPayment.html">Documentation for addPayment operation</a></p>
  </div>
</soa:showforoperation>
showforanonymoususer
If there is some content in your documentation that you want to share broadly to all viewers, whether logged in or not, you can apply the showforanonymoususer tag, as shown below.
<soa:showforanonymoususer>
  <div class="soa-ui-cm-dynamic-docs">
    <div class="get-started">
      <p><a class="button soa-ui-cm-button" href="#/home/signup">Sign Up</a></p>
    </div>
  </div>
</soa:showforanonymoususer>
showforloggedinuser
If there is some content in your documentation that you want to share with all platform users who are logged in, you can apply the showforloggedinuser tag, as shown below.
<soa:showforloggedinuser>
  <div class="soa-ui-cm-dynamic-docs">
    <div class="get-started">
      <p><a class="button soa-ui-cm-button" href="#/home/signup">Sign Up</a></p>
    </div>
  </div>
</soa:showforloggedinuser>
Test
After you have finished tagging, test your documentation by performing the following checks:
- Verify that the Header, Div tags, and visibility tags are properly configured in your HTML files.
- Verify that links to tagged sections are also tagged.
- Upload HTML files (and associated graphics, PDFs, etc.) to the API > Documents section of the platform using the File Manager.
- Verify that Licenses, Scopes, and Operations you specified in the visibility tags are properly selected on the Scope Mapping > Edit API Scope page. If Licenses, Scopes, or Operations are not visible, consult with your Site Administrator.
- Verify that licenses specified in the visibility tags are available in the API Access Wizard. To do this you can Create a New App and submit an API Access Request by selecting Access on the API > Details page.
- Create several test user accounts and request API access using various scenarios that will illustrate visibility and restricted visibility of API documentation in the API > Documents section.
- If you make changes to Licenses, Scopes, or Operations, update the API documentation HTML files accordingly.